Securing Your Entire Home Network With encrypt.me
If you have an eero and subscribe to eero Plus, you get a free subscription to encrypt.me , one of the most performant VPN providers I have ever used. Unfortunately they only provide an app to secure individual devices, and no clear way to protect entire networks. This leaves all your IoT devices, as well as home entertainment devices like Roku, AppleTV, etc, out in the cold.
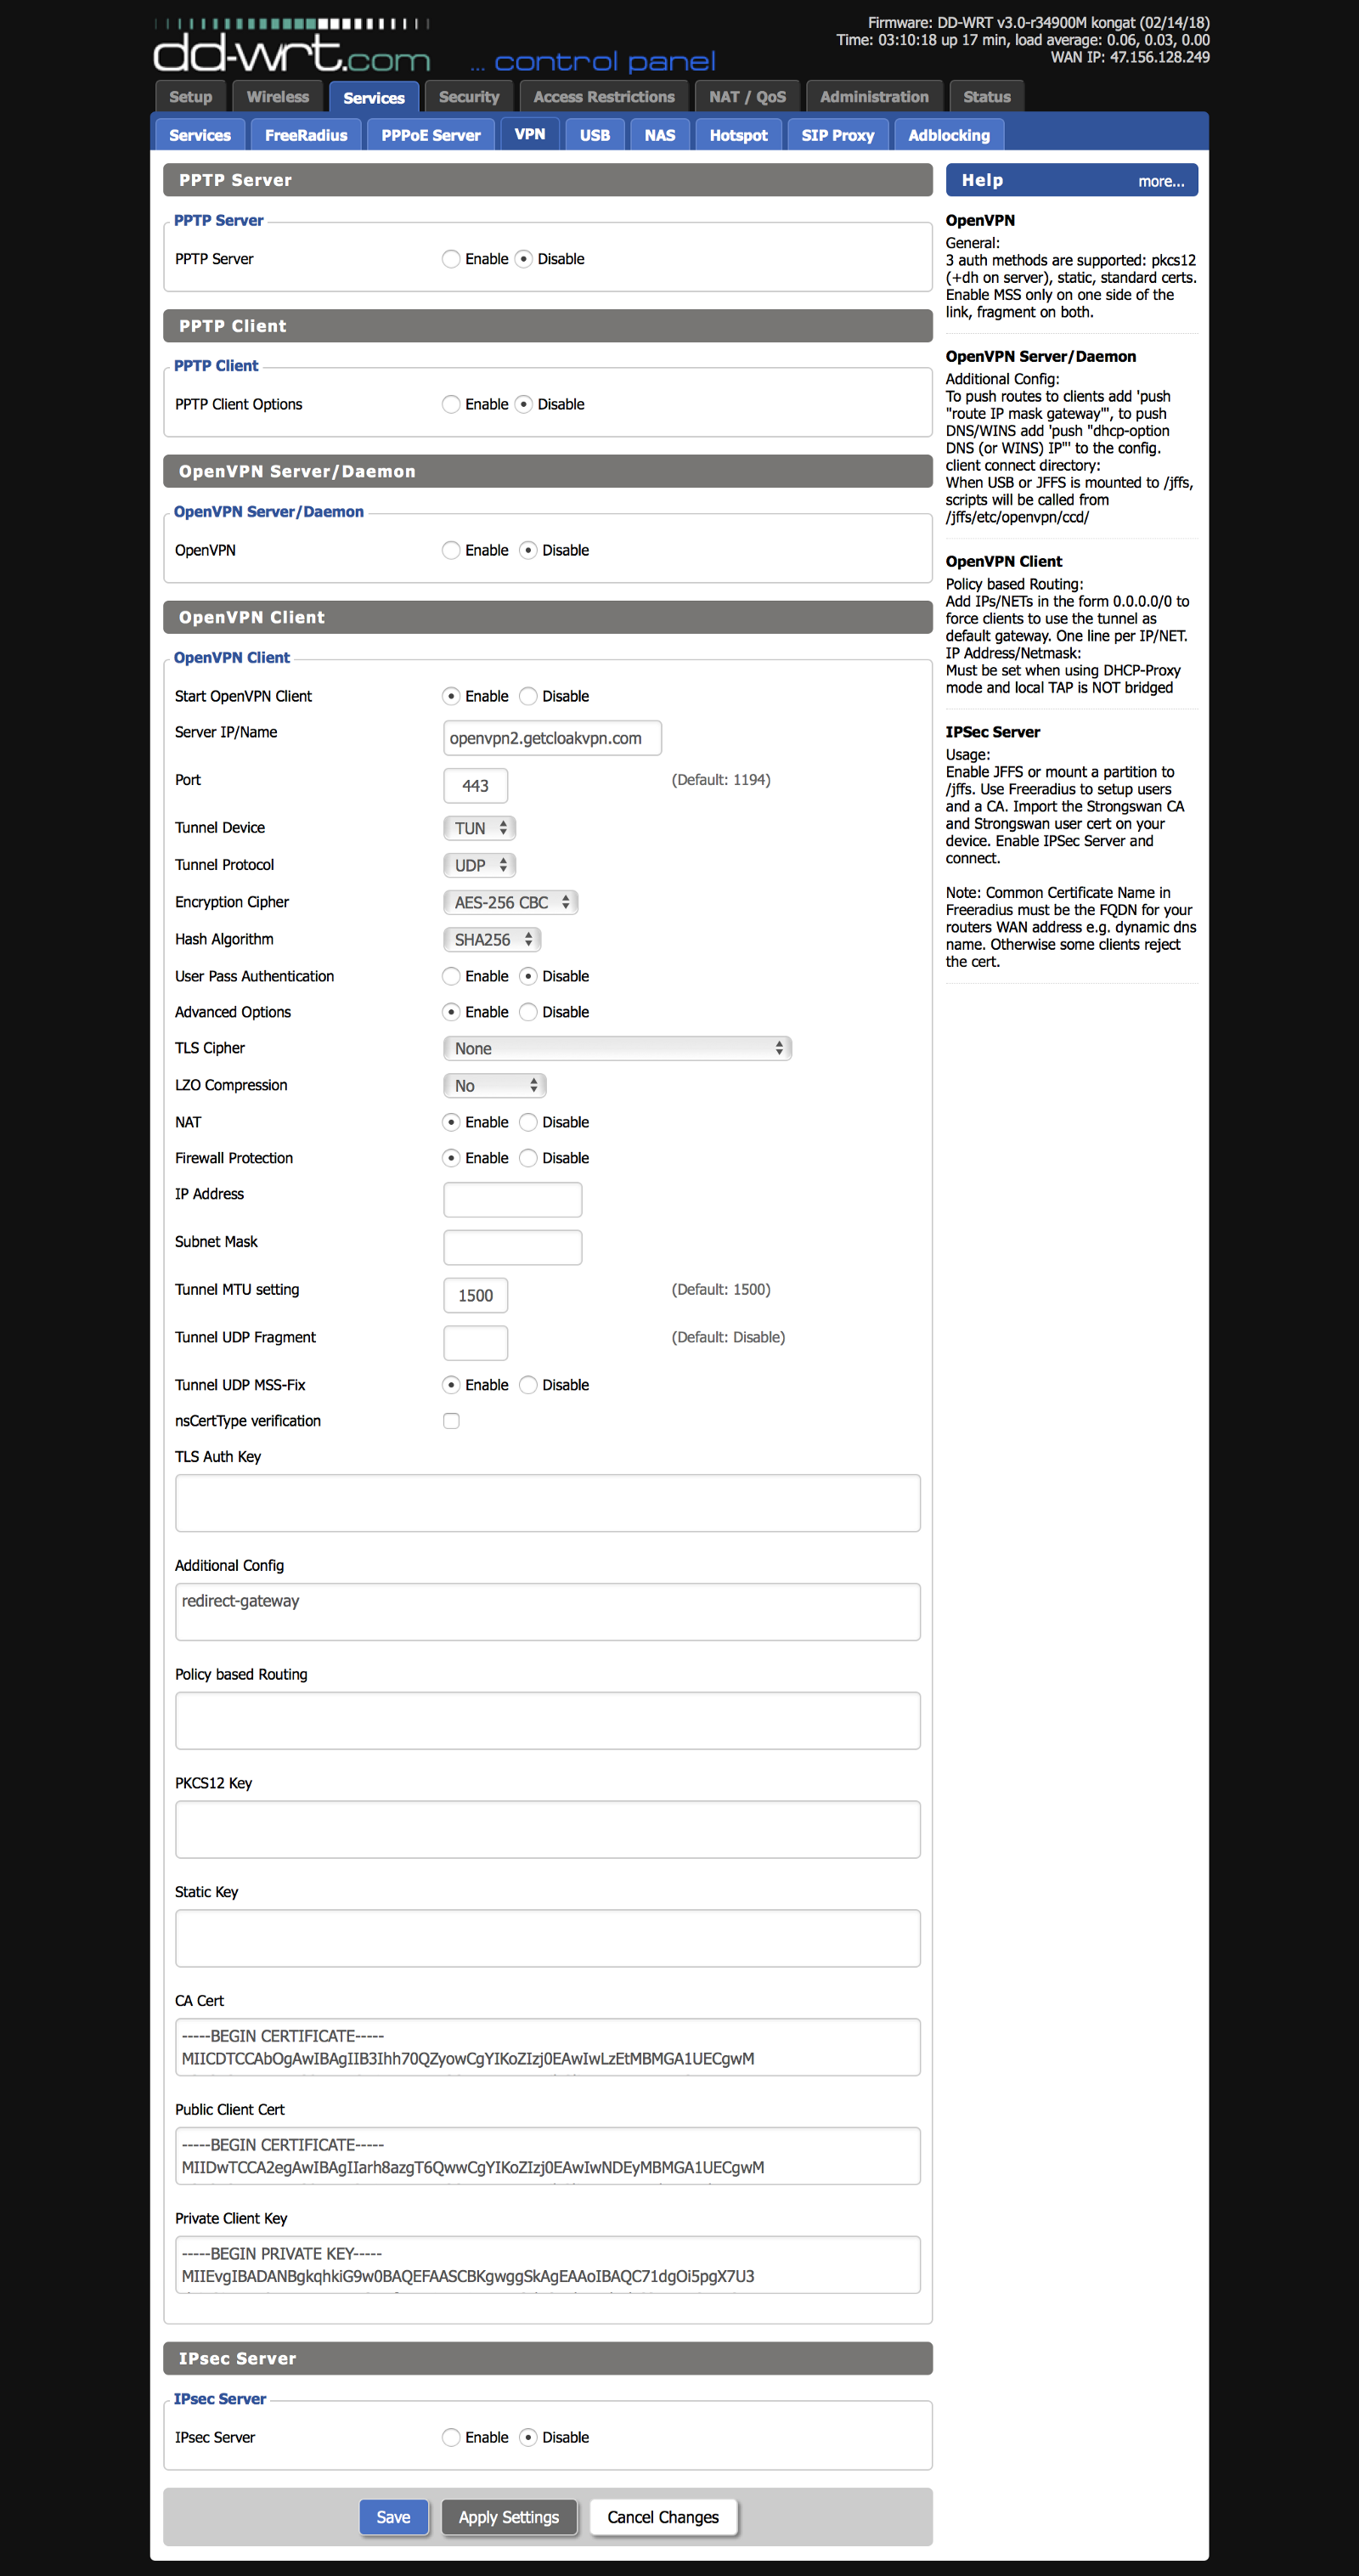
The following is a guide to help you extract the VPN settings and apply them to your OpenVPN router.
If you are using an eero and want to implement network-wide VPN, you will have to create a VPN gateway in front of your eero and either put the eero in bridge mode or double-nat it, which is what I do.
Assumptions
- macOS desktop
- DD-WRT VPN gateway router
- EncryptMe app is installed.
If your setup differs, please make the appropriate adjustments to this guide.
Guide
Get The Configuration
-
Open the EncryptMe app on your computer.
-
Connect to your preferred or fastest connection.
-
Open Terminal and enter the following commands:
sudo -i ps aux | grep openvpn -
Extract the location of the OpenVPN config file from the output.
-
Output the content of the config file:
cat /var/folders/zz/zyxvpxvq6csfxvn_n0000000000000/T/cloak.20190527094324.conf -
Quit the EncryptMe app.
Implement The Settings
- Navigate to the VPN settings page on your router.
- Enable Start OpenVPN Client.
- Enter the server listed in the
remotesetting in Server IP/Name. - Enter the port listed in the
remotesetting in Port. - Enter the protocol listed in the
remotesetting in Tunnel Protocol. - Select the cipher listed in the
ciphersetting in Encryption Cipher. - Select the algorithm listed in
authsetting in Hash Algorithm. - Leave User Pass Authentication disabled.
- Enable Advanced Options.
- Leave TLS Cipher set to
None. - Select the compression listed in
comp-lzosetting in LZO Compression. - Enable NAT.
- Enable Firewall Protection.
- Leave IP Address empty.
- Leave Subnet Mask empty.
- Set Tunnel MTU Setting to
1500. - Leave Tunnel UDP Fragment empty.
- Enable Tunnel UDP MSS-Fix.
- Uncheck nsCertType Verification.
- Leave TLS Auth Key empty.
- Set Additional Config to
redirect-gateway. - Leave Policy Based Routing empty.
- Leave PKCS12 Key empty.
- Leave Static Key empty.
- Copy paste the text between the
<ca>and</ca>tags into the CA Cert field. - Copy/paste the text between the
<cert>and</cert>tags into the Public Client Cert field. - Copy/paste the text between the
<key>and</key>tags into the Private Client Key field. - Hit Apply Settings.
- Navigate to the Status > OpenVPN tab to verify that the connection succeeded. It may take a moment to connect, so if you don't see
CONNECT SUCCESSyet, give it a few refreshes. If it still doesn't connect, double-check that the settings were entered correctly. See the screenshot below as an example of what it should look like.
Example Screenshot

Summary
Benefits
- One single connection that protects your entire network.
- Highly performant VPN service.
- Free VPN, if you are an eero Plus subscriber.
Drawbacks
- Amazon, Netflix, and other streaming providers don't like VPNs and block them. Encrypt.me does not seem to provide any form of unblocking services to address this.
- The certs seem to expire every 3 months or so, which means you need to periodically perform this exercise to keep your connection up.
- Encrypt.me does log session and browsing activity, which some claim defeats the purpose of VPNs. My main priority is protecting my privacy, mainly my ISP from reselling my data.
- Encrypt.me blocks certain traffic they deem "nefarious" by default. For example they block torrent traffic, but it can be unblocked per request on your account.
I would love to hear your experiences, or suggestions on improving this process. How are you protecting your network?
